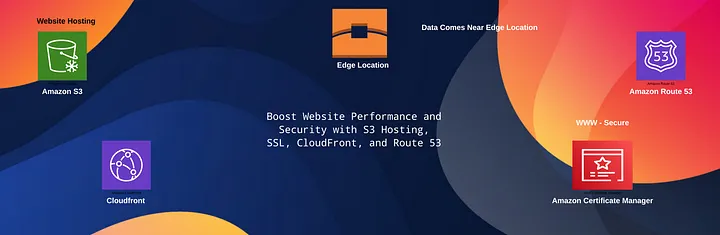
Boost Website Performance and Security with S3 Hosting, SSL, CloudFront, and Route 53
By Ashwin Sharma
In this guide, I’ll walk you through how to set up a secure static website on AWS. We’ll start by using Amazon S3 to store and host the website files. Then, we’ll get a custom domain name and manage DNS settings with Amazon Route 53. To make sure your site is secure, we’ll add an SSL certificate. Finally, we’ll use CloudFront to deliver your website’s content quickly and efficiently.
 Prerequisites:
You’ll need an Amazon Web Services (AWS) account to get started.
Services Used:
- Amazon S3 for hosting your website files
- Amazon Route 53 for managing your domain and DNS
- AWS Certificate Manager (ACM) for securing your site with an SSL certificate
- Amazon CloudFront for fast and efficient content delivery
Create an Amazon S3 Bucket
Amazon S3 (Simple Storage Service) is a cloud storage service from AWS that lets you store and retrieve files easily over the internet. It’s perfect for various needs like backups, archiving, big data analysis, and distributing content. With S3, you can store data in different formats and scales, and it offers high durability and availability.
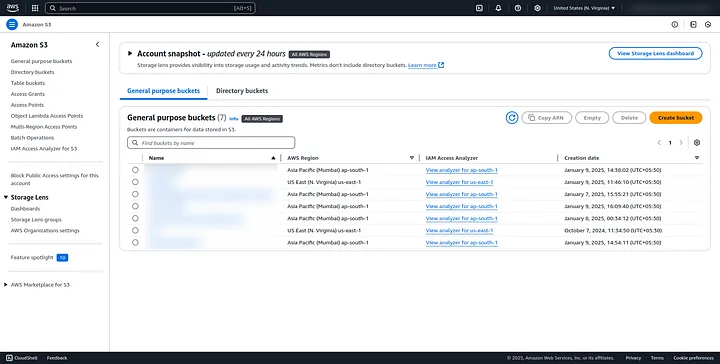
You’ll use an Amazon S3 Bucket to store your website files. To get started, go to the AWS Management Console, search for S3 in the search bar at the top, and select it from the list of services.
- On the next page, click on Create Bucket.
- On the Create bucket page, fill in the following details:
- Bucket name: Enter your domain name (e.g., example.com).
- AWS Region: Choose the region that’s closest to your location for better performance.
- Scroll down to the Block Public Access settings for this bucket section. By default, this will be set to Block public access.
- Uncheck the box to allow public access to the bucket, making it accessible for others to view your website.
- Scroll down a little more and check the box to confirm you understand the warning about enabling public access.
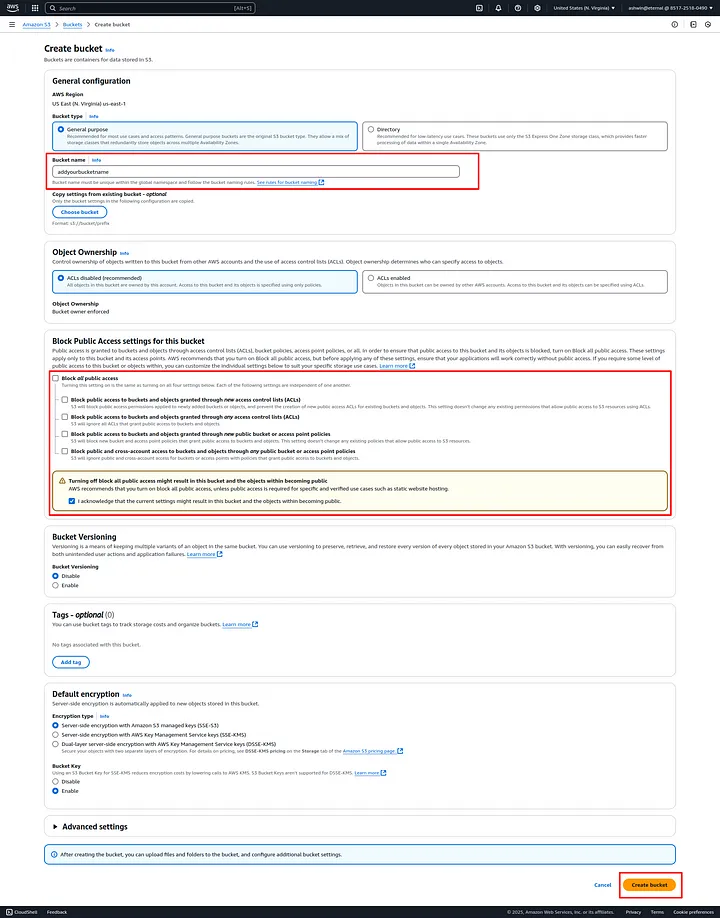
- Scroll to the bottom of the page and click on Create Bucket.
- After the bucket is created, you should see your domain name listed as the bucket name.
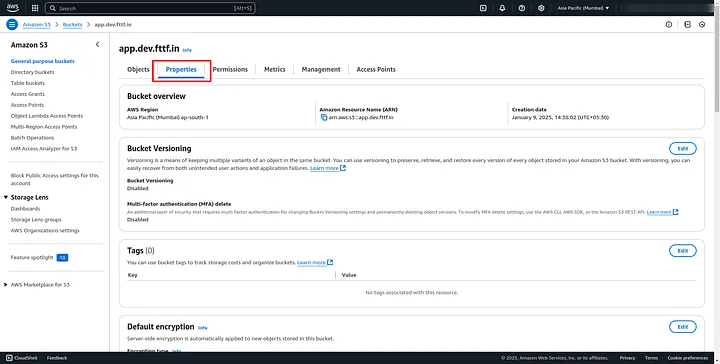
- Next, click on your bucket name to open the bucket settings and make necessary adjustments.
- In the bucket list, find and click on your bucket name.
- Go to the Properties tab, then scroll down to the Static website hosting section.
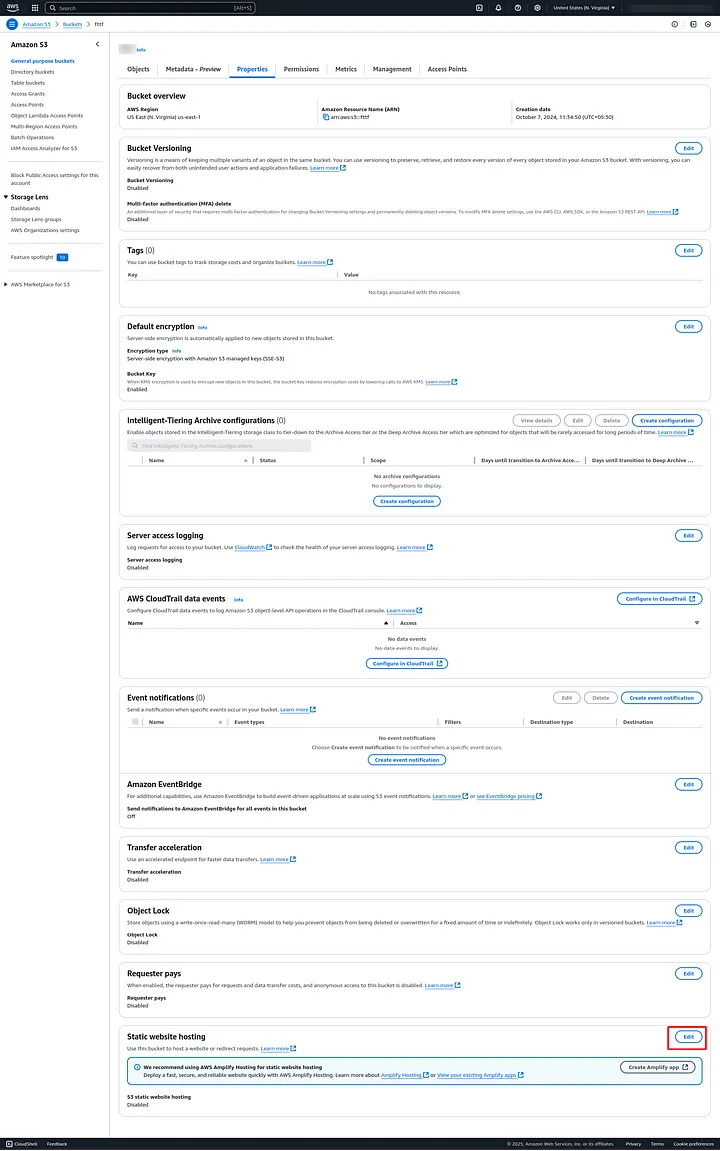
- In the Static website hosting, click on the Edit button.
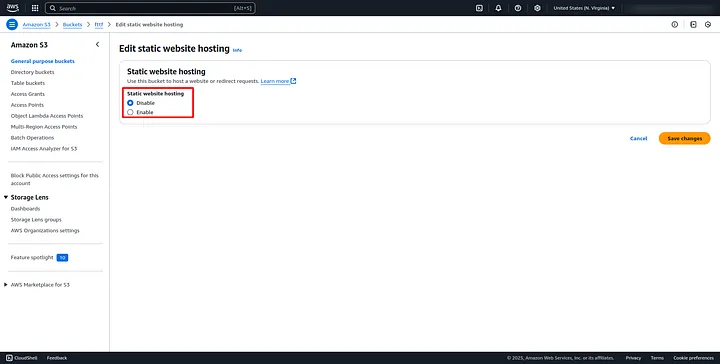
- Enable static website hosting by selecting Enable.

- In the Index document field, type index.html.
Create a Bucket Policy
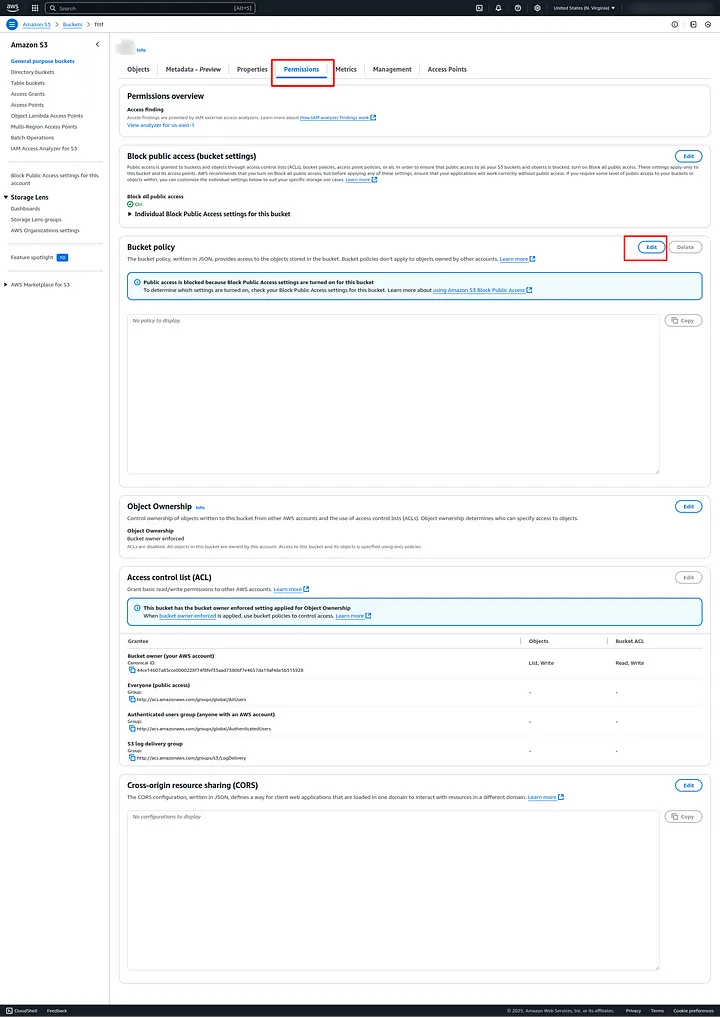
1. Go to the Permissions tab of your bucket.
2. Scroll down to the Bucket Policy section and click on Edit.
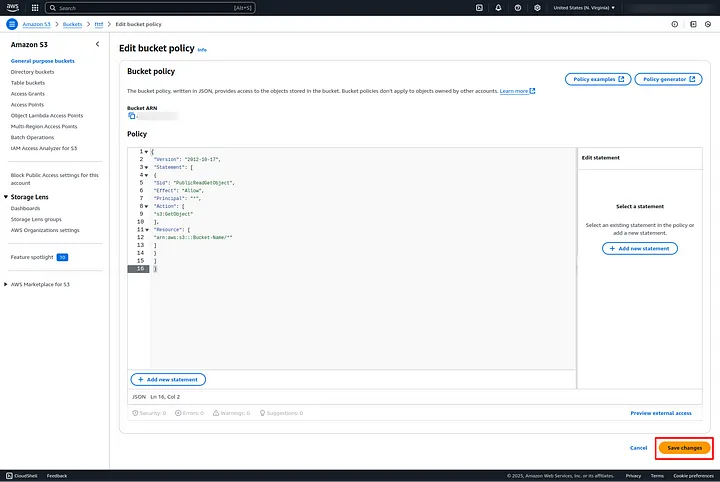
- Copy the code below and paste it into the Bucket Policy field in the AWS console.
- Make sure to replace Bucket-Name with the name of your S3 bucket that you configured earlier.
                            {
                                “Version”: “2012–10–17”,
                                “Statement”: [
                                {
                                “Sid”: “PublicReadGetObject”,
                                “Effect”: “Allow”,
                                “Principal”: “*”,
                                “Action”: [
                                “s3:GetObject”
                                ],
                                “Resource”: [
                                “arn:aws:s3:::Bucket-Name/*”
                                ]
                                }
                                ]
                                }
Redirect the Custom Domain to the S3 Bucket URL
1. Next, go to Route 53 to set up the DNS record for your custom domain, so it redirects to your S3 bucket website.
2. In the top search bar of the AWS console, type Route 53 and select it from the list of services.
3. From the Route 53 Dashboard,, click on Hosted Zones.
4. In the Hosted Zones section, click on your domain name.
5. Click on Create Record.
6. On the Create record page, create an alias record for your root domain so it redirects to your S3 bucket. Enter the following details:
- Alias: Toggle the switch to on.
- Route traffic to: Select Alias to S3 endpoint.
- Region: Choose the region for your S3 endpoint.
- Enter S3 endpoint: Select your S3 bucket from the list.
- Routing Policy: Choose Simple Routing.
1. Click on Create records.
You should now see a confirmation that the DNS record for your domain was successfully created.
Test Your Website URL
1. Open your web browser and enter the Fully Qualified Domain Name (FQDN) of your domain.
2. Your website should be live once the DNS records have finished propagating. Congratulations! You’ve successfully hosted a static website on Amazon S3!
Note: If you see a warning that your website is unsecured, don’t worry. This happens because the site doesn’t have an SSL certificate yet. To fix this, we can request a free SSL certificate through Amazon Certificate Manager (ACM). Let’s go ahead and do that!
Step 4: Request a Certificate from AWS Certificate Manager (ACM)
Amazon Certificate Manager (ACM) is a service that helps you manage and deploy SSL/TLS certificates to secure your website. These certificates help browsers establish secure connections with your site.
1. In the AWS Management Console, search for Certificate Manager in the top search bar and select it from the list of services.
2. Important: Ensure you’re in the US East (Virginia) region when requesting the certificate.
3. Click on Request a certificate.
4. Select the first option: Request a public certificate, then click Next.
5. In the Domain names section, enter your Fully Qualified Domain Name (FQDN) (e.g., www.yourdomain.com).
6. Scroll down to the Validation method section and choose DNS validation (this is the recommended and easiest method for validating your domain).
7. Scroll down to Key algorithm and choose RSA 2048 for encryption.
8. Click on Request.
Once the request is successful, you’ll see a message confirming the certificate was requested. It will show as Pending validation.
1. Click on the certificate ID in the list, and on the details page, scroll to the Domains section.
2. Click on Create records in Route 53 to let ACM automatically create the required DNS record for validation.
3. On the next page, check the box next to your domain name, then click Create Record.
4. After this, your domain validation status will show as Success and the certificate will be marked as Issued.
Step 5: Add CloudFront Distribution
1. Now that you have an SSL certificate, we need to create a CloudFront distribution to use it and secure the access to your website
2. In the AWS Console, search for CloudFront in the search bar and select it from the list.
3. On the CloudFront dashboard, click on the Create Distribution button.
4. In the Origin domain field, select your S3 bucket’s URL.
5. You’ll be prompted to change your S3 static site to a website endpoint. Click on the button to complete this conversion.
6. After the change, your origin domain name will include “website” in the URL.
7. Scroll down to the Default Cache Behavior section and set the options as follows (you can leave them as defaults unless you have specific needs).
8. In the Custom SSL Certificate section, choose the SSL certificate you created earlier.
9. Scroll to the bottom and click Create Distribution.
Once created, you should see a banner indicating the distribution was successfully created.
Step 6: Update DNS Record to Point to CloudFront Distribution
In this final step, you will update your DNS records to point to the CloudFront distribution for secure access to your website.
In the AWS Console, search for Route 53 and select it from the list of services.
From the Route 53 Dashboard, click on Hosted Zones.
Select your domain name from the list of hosted zones.
Click the checkbox next to your A record.
In the Edit pane, modify the Route traffic to field to Alias to CloudFront distribution and click Save.
Final Thoughts
Congratulations! You’ve successfully deployed a secure static website on AWS using S3, ACM for SSL, CloudFront for content delivery, and Route 53 for DNS management.
Feel free to create your own index.html page or use an HTML template to customize your website. Once everything is set up, your website should be accessible securely with HTTPS.
Happy Learning!